Managing sales and deliveries in the fashion industry requires precision, flexibility, and speed. With its dynamic demands and constant influx of new trends, businesses need tools that streamline these processes while maintaining accuracy
FashionNX offers a comprehensive platform designed to address these challenges, enabling users to efficiently handle sales orders, manage inventories, and ensure timely deliveries. Whether dealing with bulk imports or individual sales, the platform provides a seamless experience tailored to meet the unique needs of the fashion sector.
This blog delves into the robust features of FashionNX’s Sales and Delivery modules, showcasing how businesses can simplify their operations. From creating sales orders with barcode scanning to organizing deliveries with detailed packing and logistics tracking, FashionNX offers solutions for every stage of the process.
By leveraging these tools, businesses can focus on what truly matters—delighting their customers and growing their brand. Join us as we delve deeper into handling sales orders and deliveries seamlessly in FashionNX.
Accessing Sales Module
The journey starts in the Sales Module. To access it, users need to navigate to Modules > Operations > Sales
The Sales module provides various sales activity options, including:
- Sales Request
- Sales Order – Sets
- Sales Order – Individual
- Sales Order – Import
- Sales Order – Import Multiple
- Generate Picklist
- Delivery
- Delivery – Packages
- Sales Return
- Sales Return – B2C
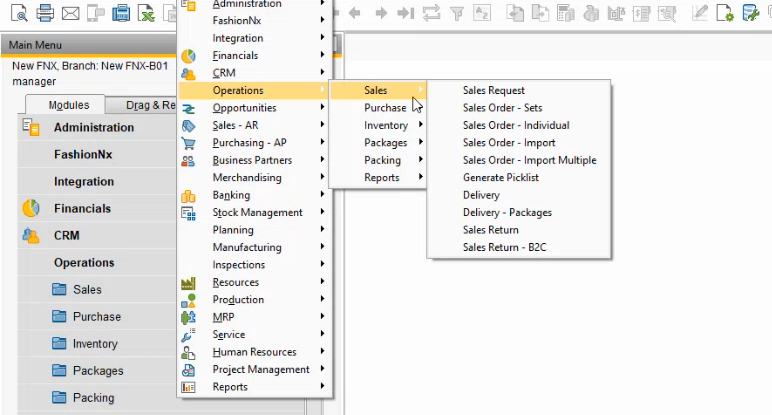
Users can create or accept sales orders through individual and multiple sources using these options. Importing sales orders via Excel templates is an option as well.
Sales Order – Sets
Accessing Sales Order – Sets
To create a sales order, open the Sales Order – Sets window by navigating to Modules > Operations > Sales > Sales Order – Sets
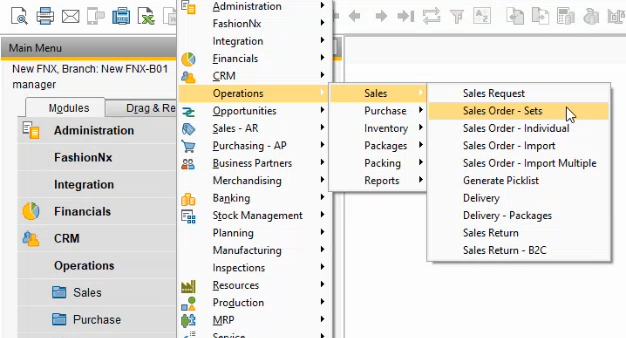
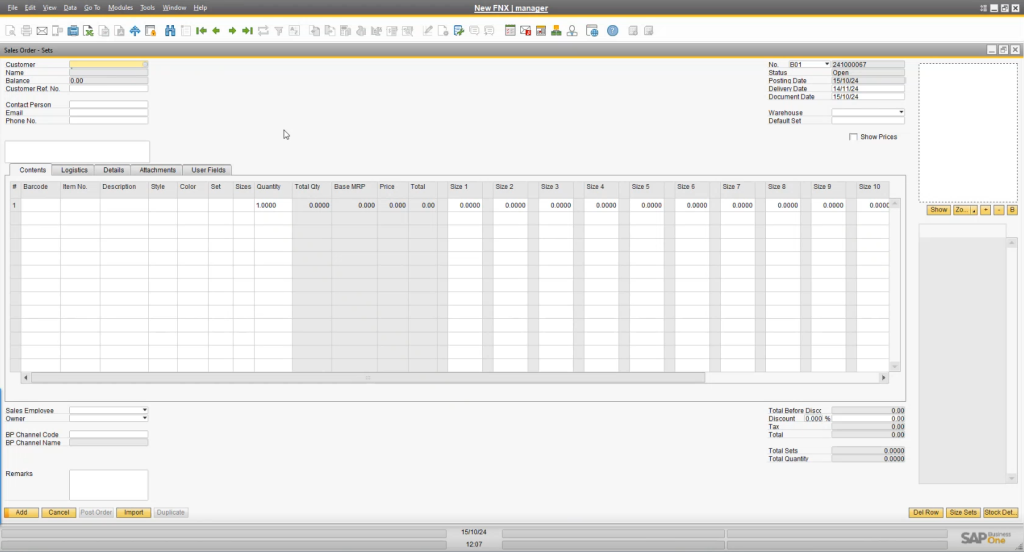
This opens the Sales Order – Sets window, with the following sections:
- Top Left Fields: Customer, Name, Balance, Customer Ref. No., Contact Person, Email, Phone No.
- Top Right Fields: No., Status, Posting Date, Delivery Date, Document Date, Warehouse, Default Set, and a checkbox for Show Prices.
- Tabs: Contents, Logistics, Details, Attachments, and User Fields.
Key Features
Sales Order – Sets streamlines sales order creation, supports new customer creation, and allows quick order processing. It includes Scanning functionality for barcodes, ideal for events like exhibitions or presentations.
For example, users can scan showcased products to accept orders instantly.
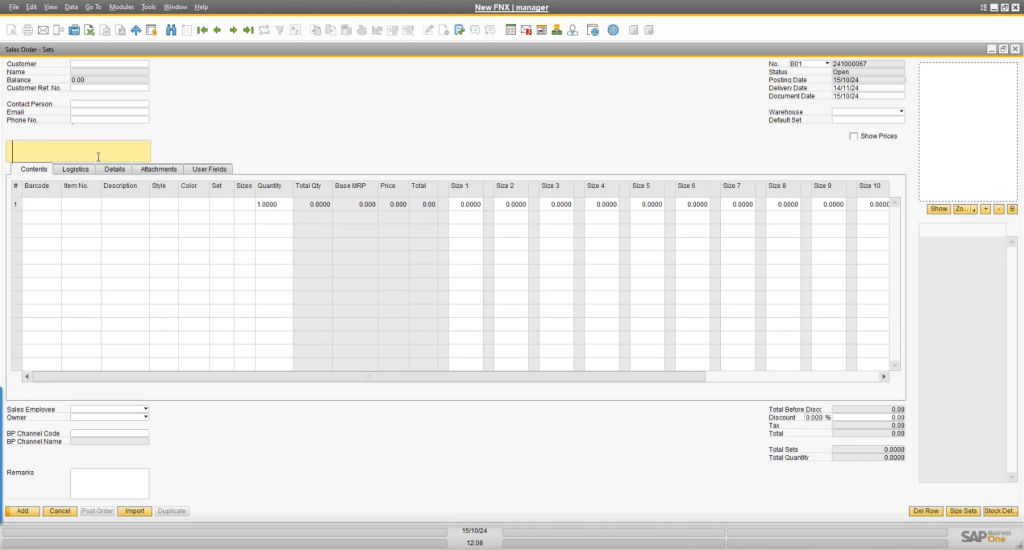
Example Workflow
Selecting a Customer
In the Customer field, users can choose a customer from the List of Business Partners
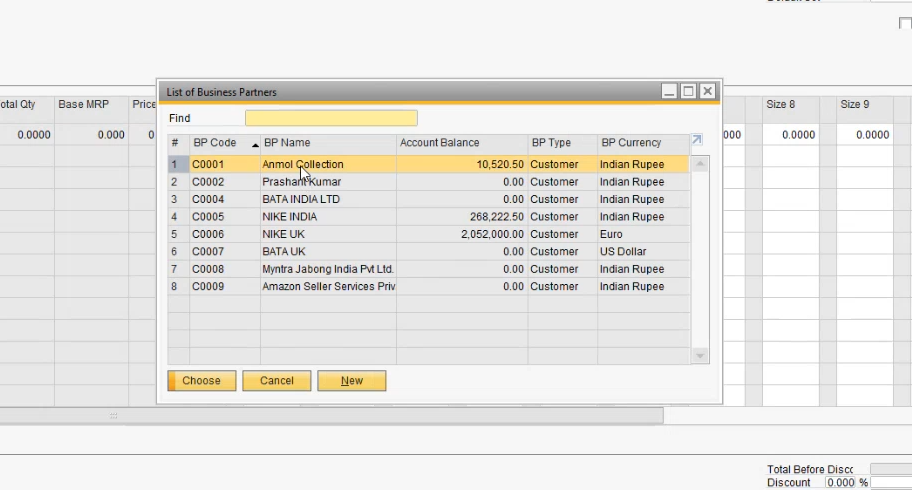
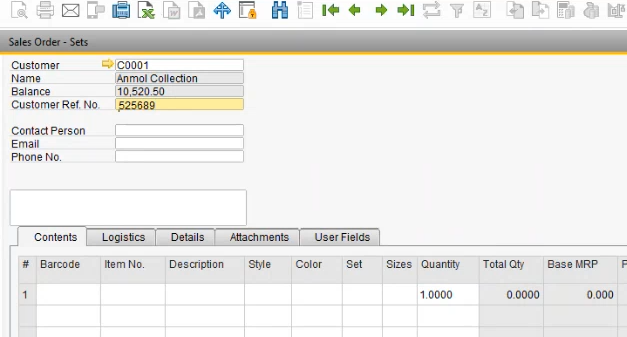
In the example, we can see the selected customer and the fields being filled – Customer – C0001, Name – Anmol Collection, Balance – 10,520.50. Users can also notice that some of the fields in the top right section have been filled – No. – B01 241000067, Status – Open, Posting Date – 15/10/24, Delivery Date – 14/11/24, Document Date – 15/10/24
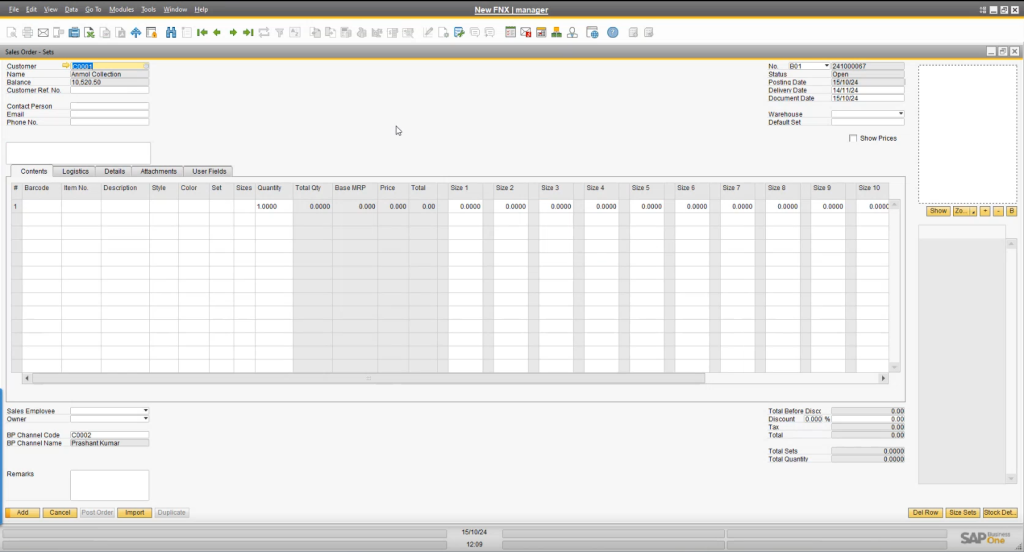
In the Customer Ref. No. field, users can enter the buyer’s purchase order number
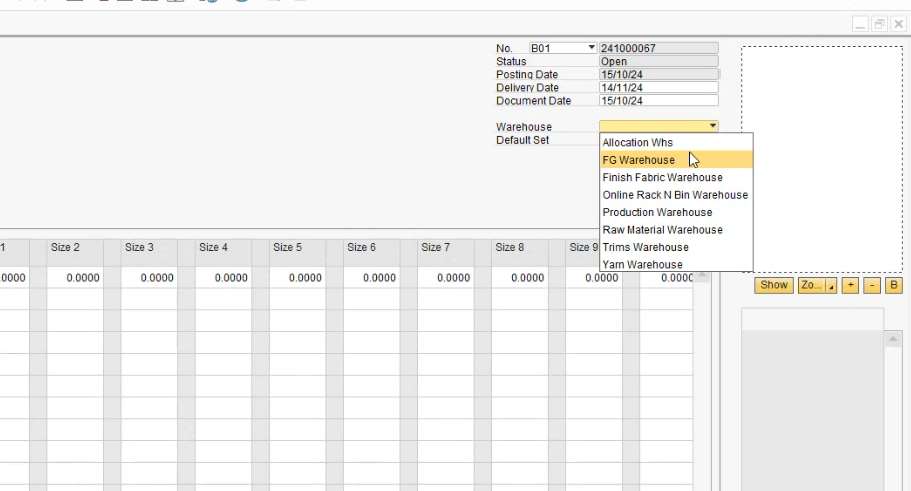
Users can also select the Warehouse from which the order will get shipped in the Warehouse field through its various drop-down options
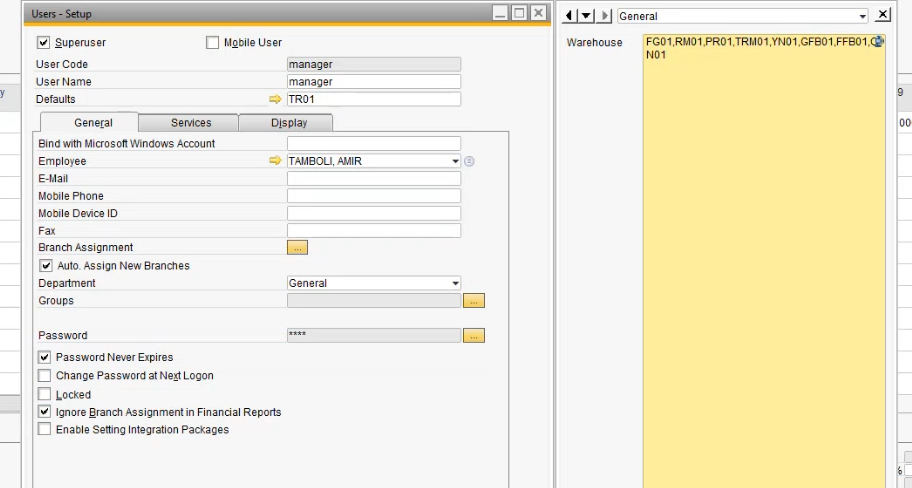
Users also can define which warehouses are assigned to the particular user operating the software
Adding Products
There are 2 ways in which the users can add products to the sales order. Products can be added via Scanning or Manually by specifying Style, Barcode, or Item No.
Scanning: Entering the product’s barcode. Details populate automatically in the Contents tab
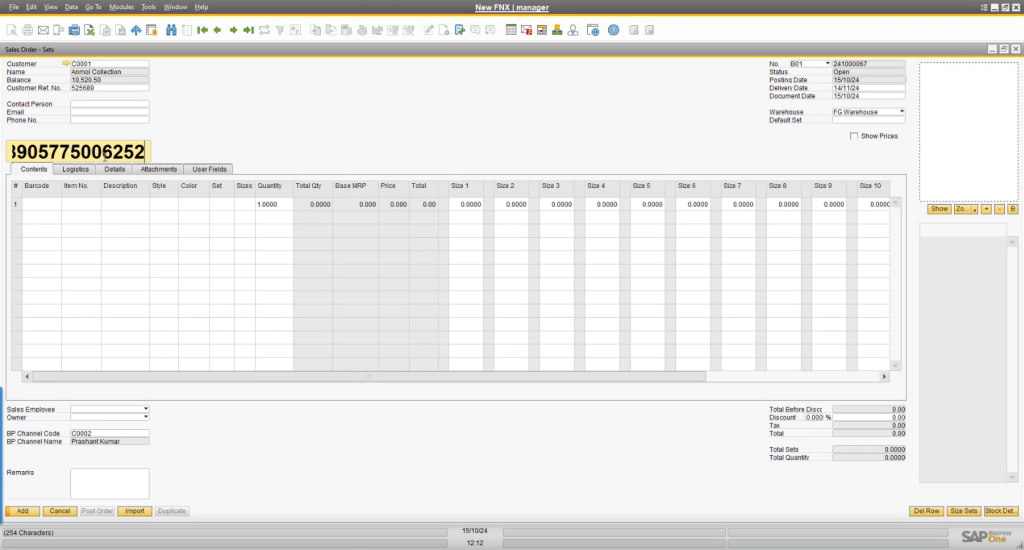
Once the barcode is scanned, the product is then displayed in the Contents tab. Users can also see the other details related to the product in the rows and columns available in the tab.
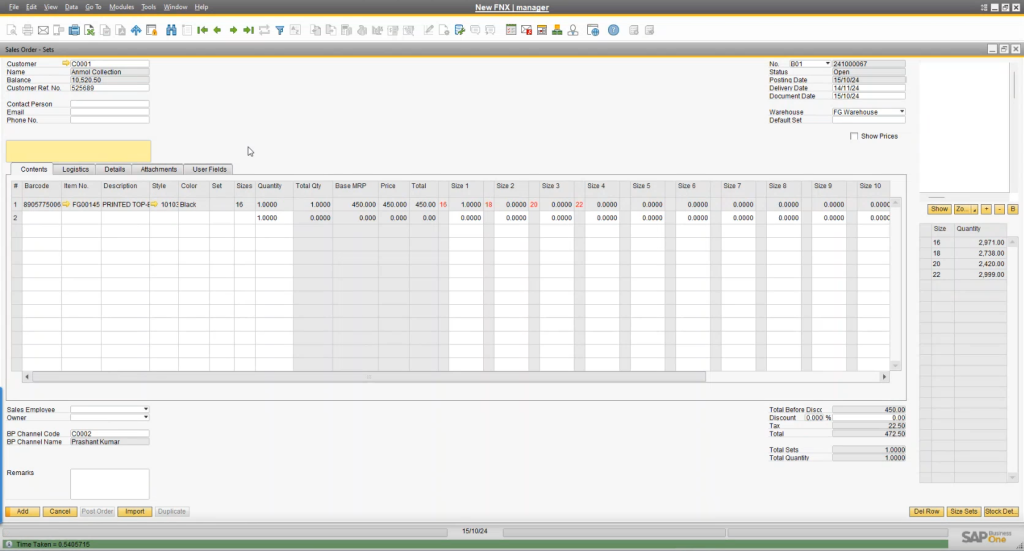
If the product has an image attached to it, it will be visible in the top right section for it
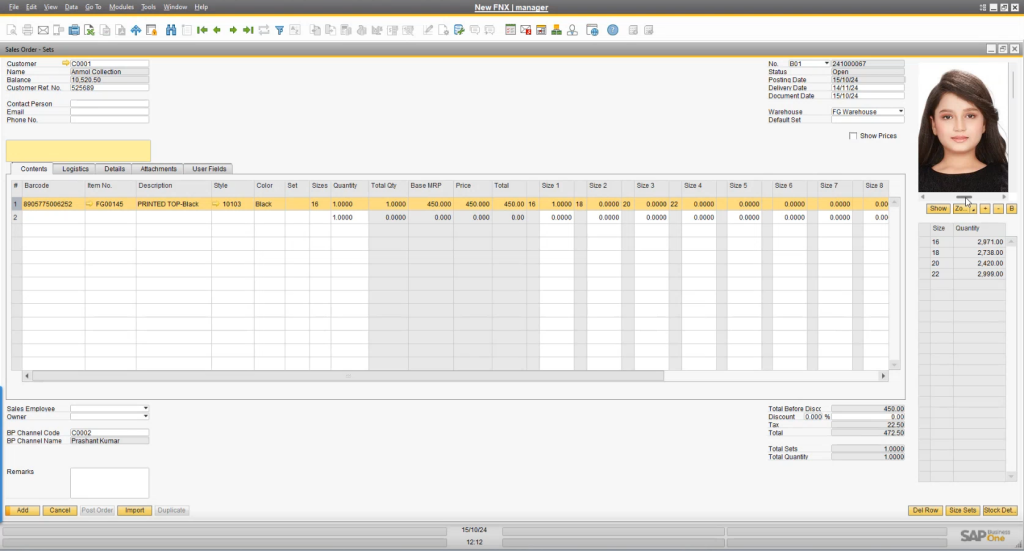
Users can also see various details related to the products such as the Barcode, Item No., Description, Style, Color, Set, Sizes, Quantity, Total Qty, Base MRP, Price, Total, and the different Size Sequences from 1 onwards
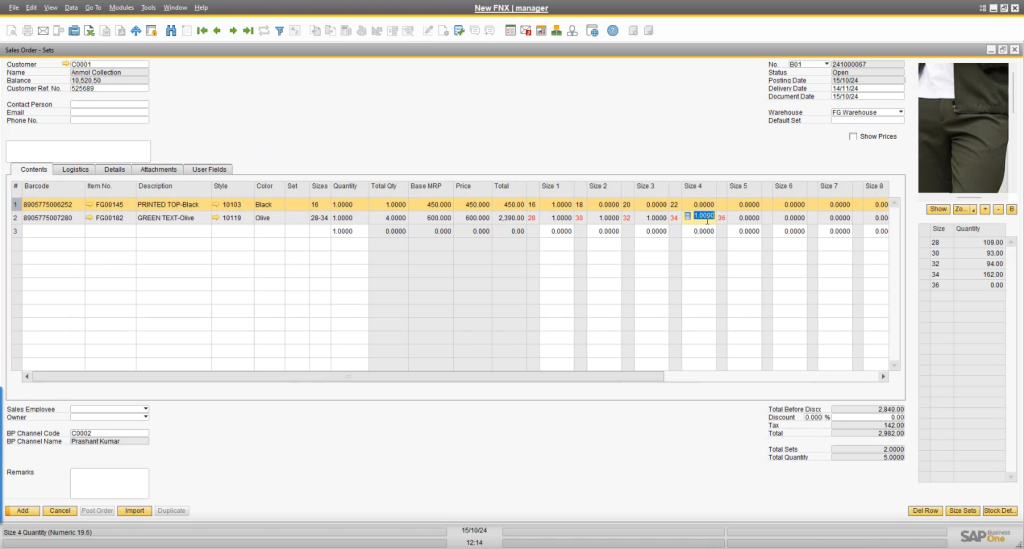
Manual Entry: In manual entry, users can use the Barcode, Item No., Description, or Style to add products. In this instance, we will be using the Style row. Users simply have to click in the Style column
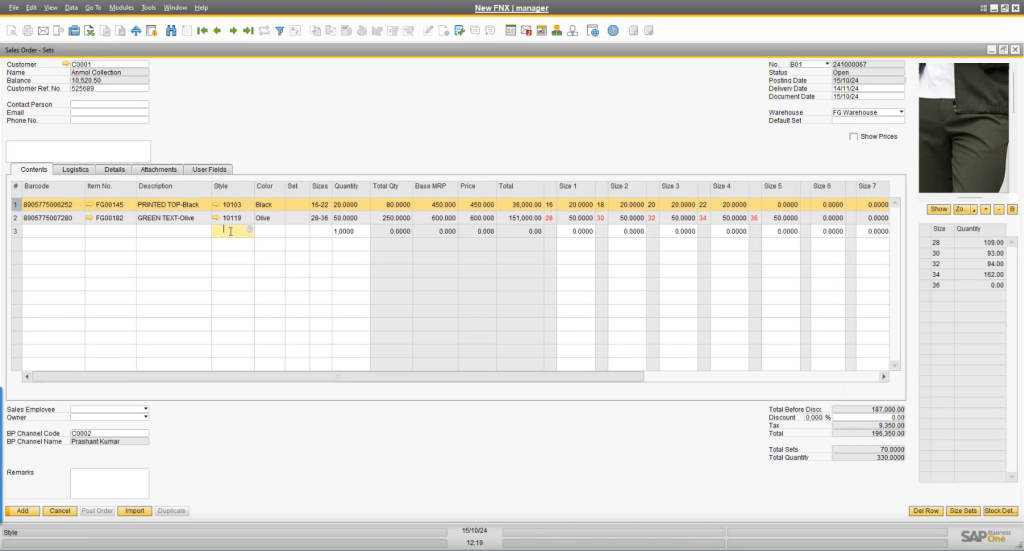
Doing so will open the List of FnxStyles window
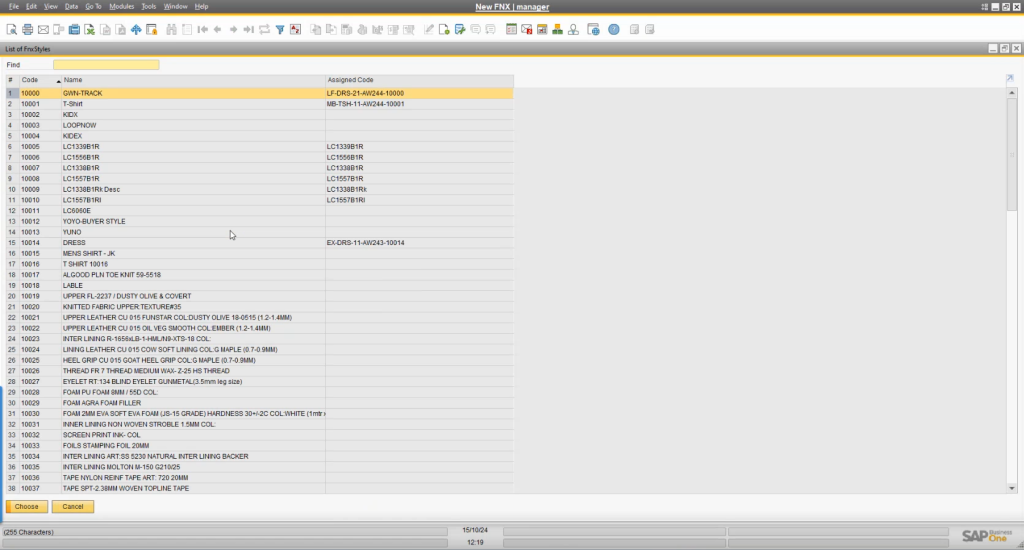
Through this window, users can select the product from the list of available options. In this case – 10014. Once done, it will show up below the already added products, minus the bar code as seen in the screenshot
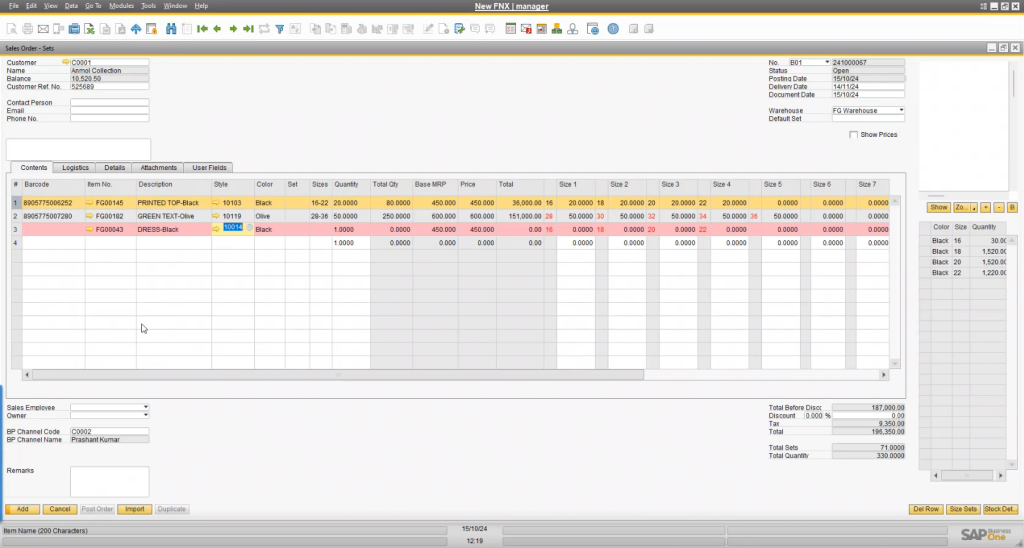
Users can notice that the newly added item is highlighted in the color Pink. This is because there is no price or quantity assigned to the product.
So first, the user can select the color of the new product in the Color column
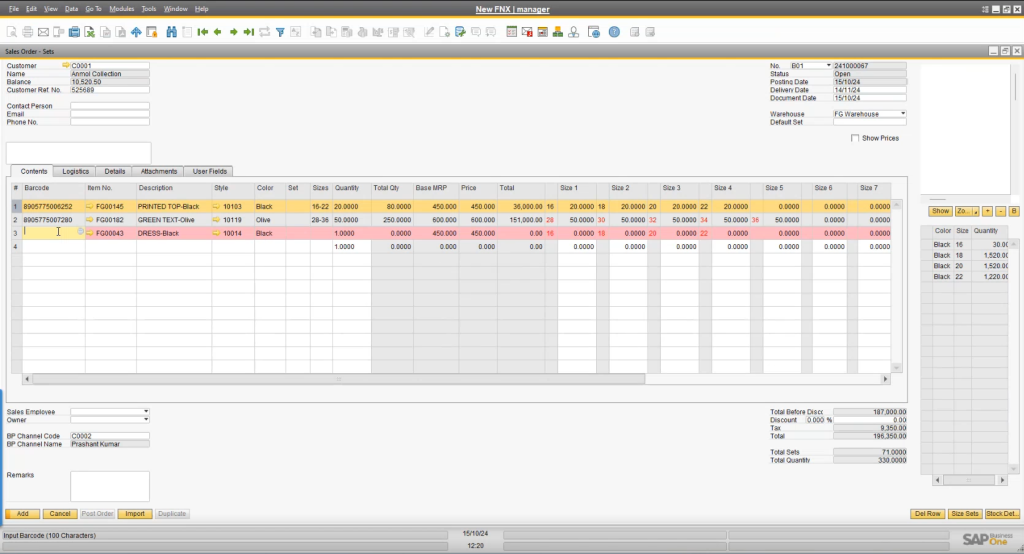
Next, the user can select the barcode according to the selected Color and Style. Simply clicking in the Barcode column will open the List of Bar Codes window
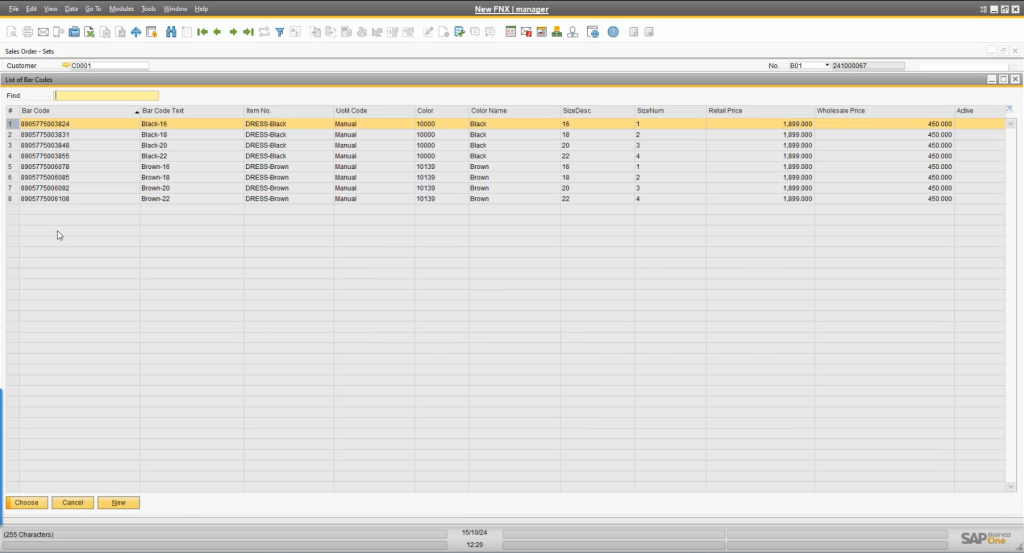
Once selected, the selected barcode will be displayed in the Barcode column of the item and the color will change to Grey and other details will be updated automatically
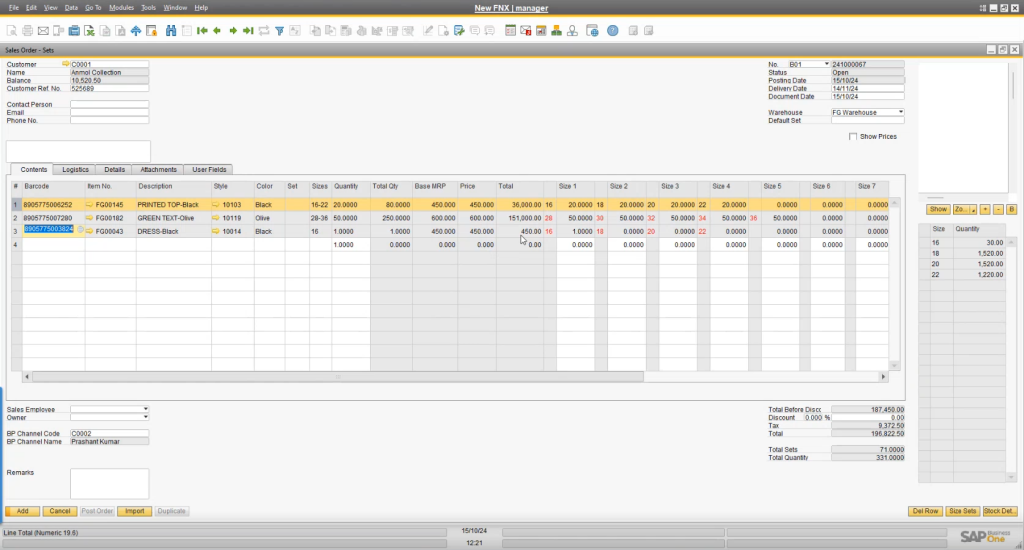
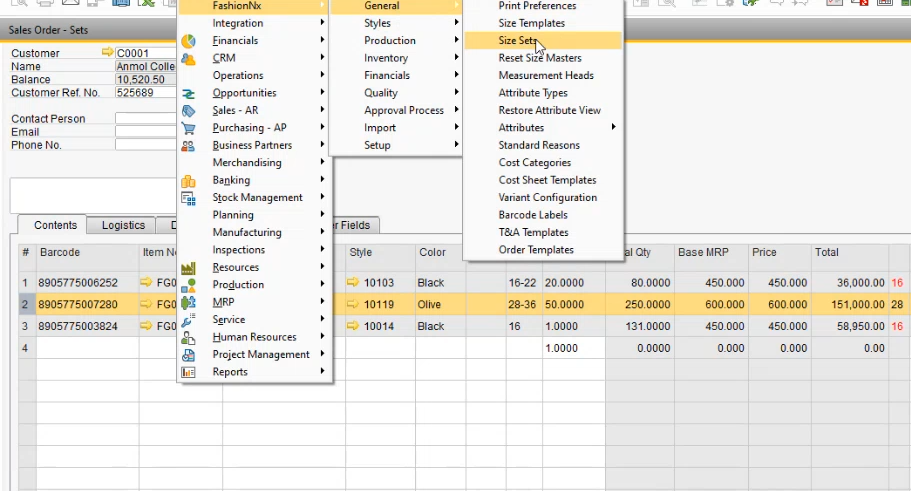
Users can also create Size Sets by clicking on Modules > FashionNX > General > Size Sets
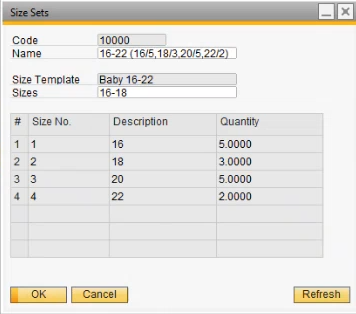
This will open the Size Sets window as seen in the screenshot of an already created Size Set
Completing the Order
Users can start by assigning the employee and document owner in the Sales Employee and Owner fields in the bottom left
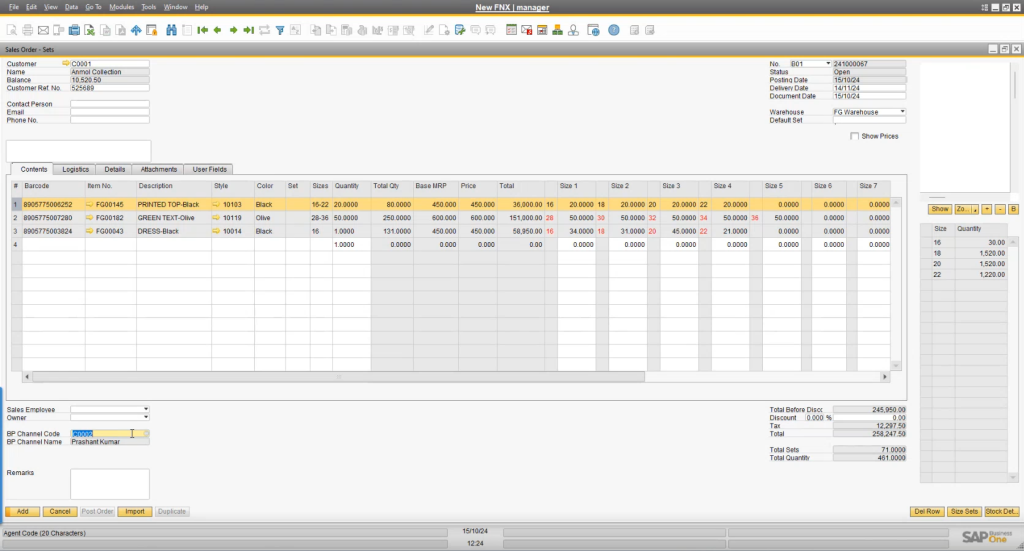
Below them are the BP Channel Code and BP Channel Name followed by the Remarks field

Once done, users can add this sales document using the Add button in the bottom left
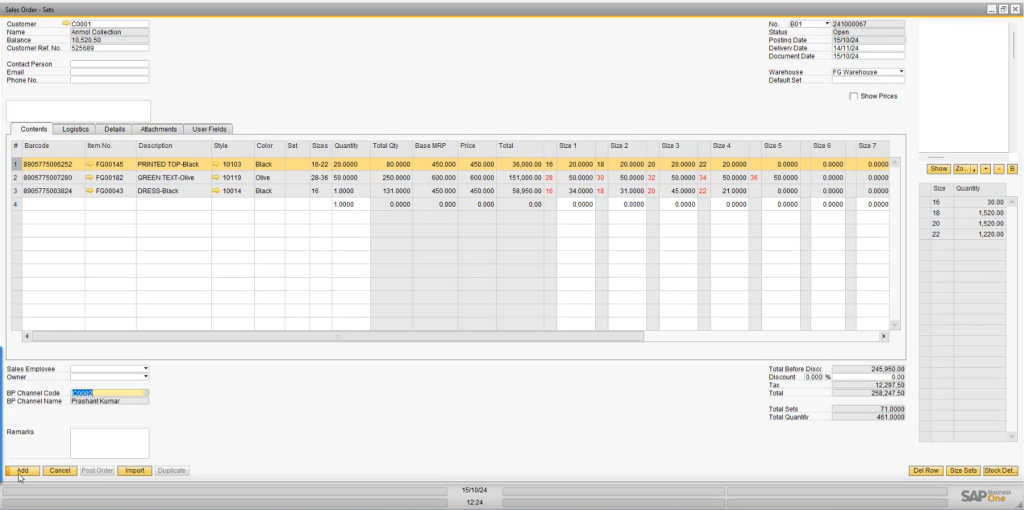
Once clicked, a System Message window will pop up with the message – “Post sales order now?” accompanied by the Yes and No buttons

As the yes button is clicked, the created sales order will open in a new window along with all the details of the same in the Sales Order window
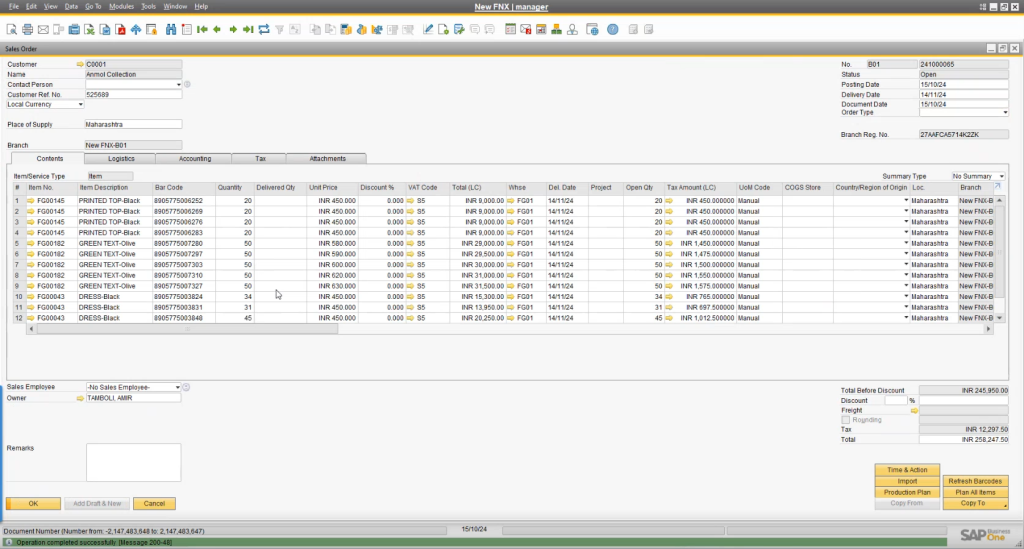
Users can also access the newly created sales order by clicking on Window>Sales Order
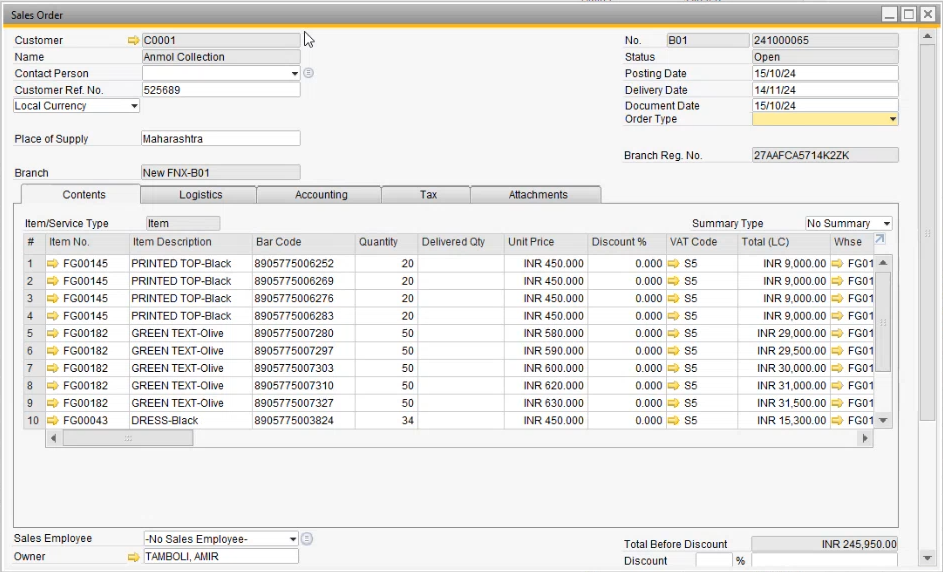
Clicking on it will open the Sales Order with all the details in it
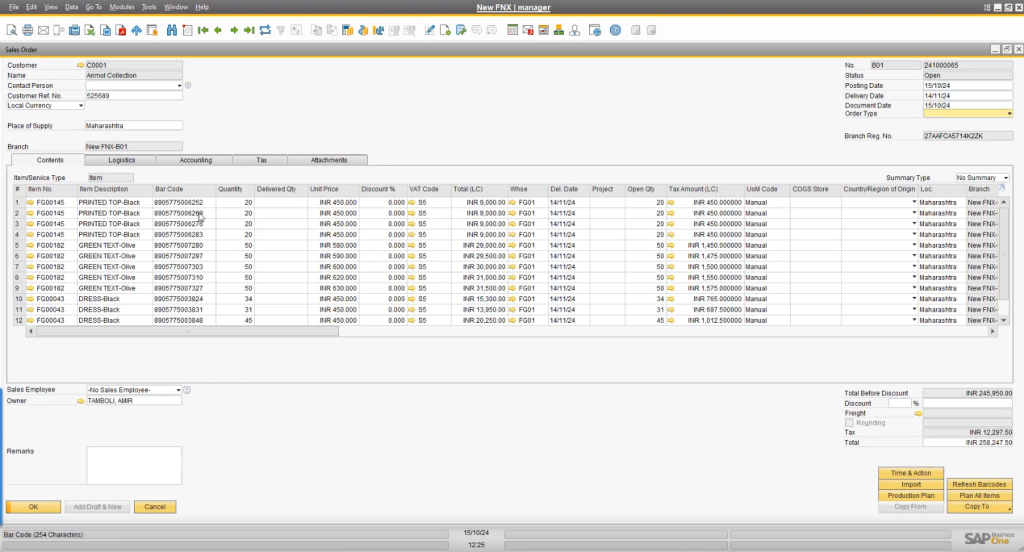
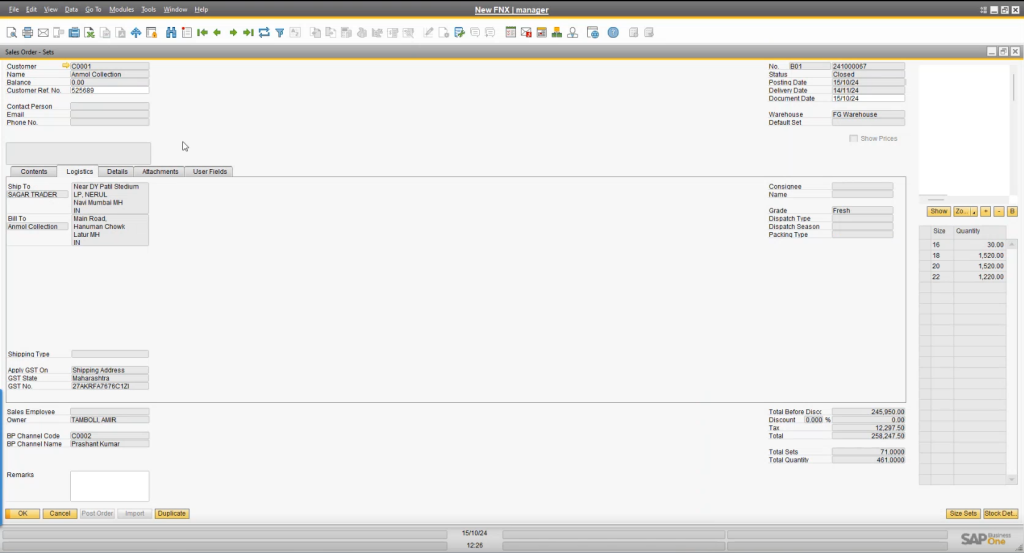
In the Sales Order – Sets window users can then see the various other tabs beside Contents updated. Starting with Logistics, clicking on it will display all the logistics details of the order
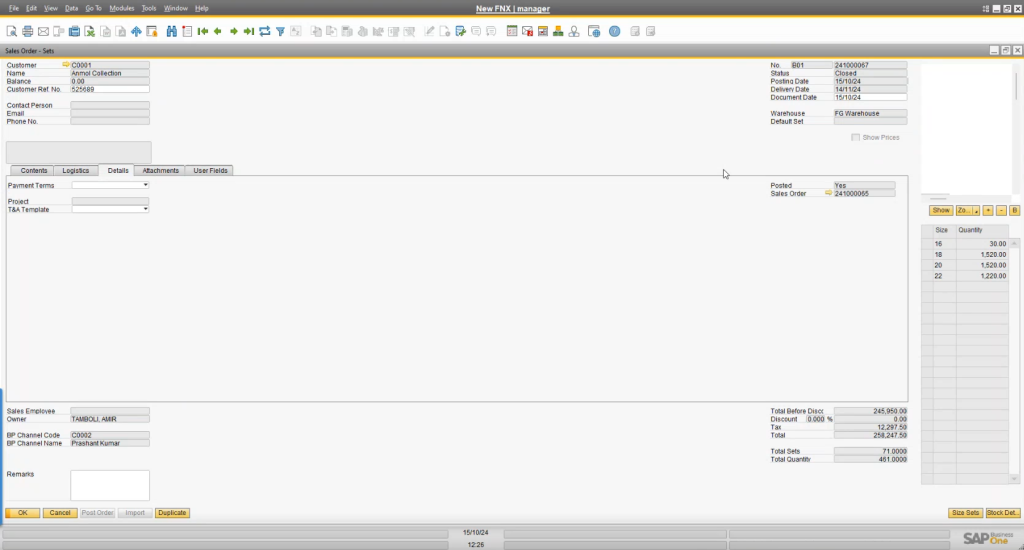
In the Details tab, they can see that the Posted field now displays Yes and the Sales Order displays the Sales Order number – 241000065
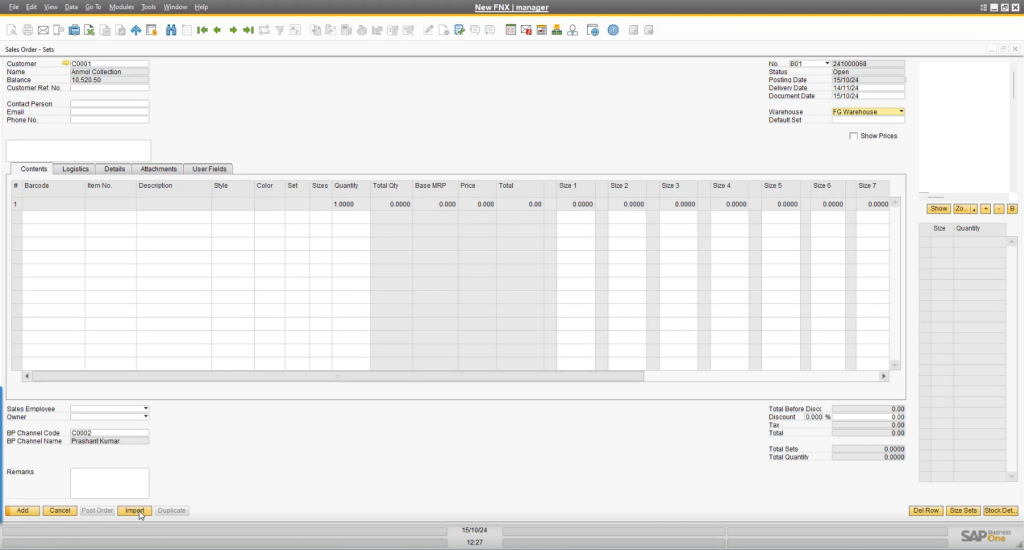
Users can also import details to create sales orders using the Sales Order – Sets.
To do so, users must first click the Import button in the bottom left
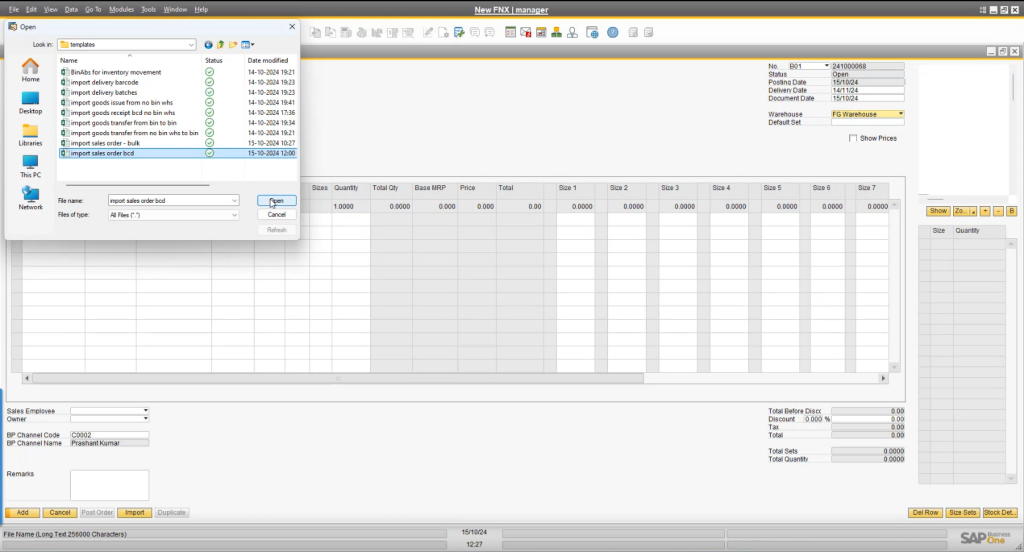
Clicking on it will open the Windows File Explorer where users can search and import the files that have the item details.
Users must then navigate to and select the particular Excel File as shown in the screenshot
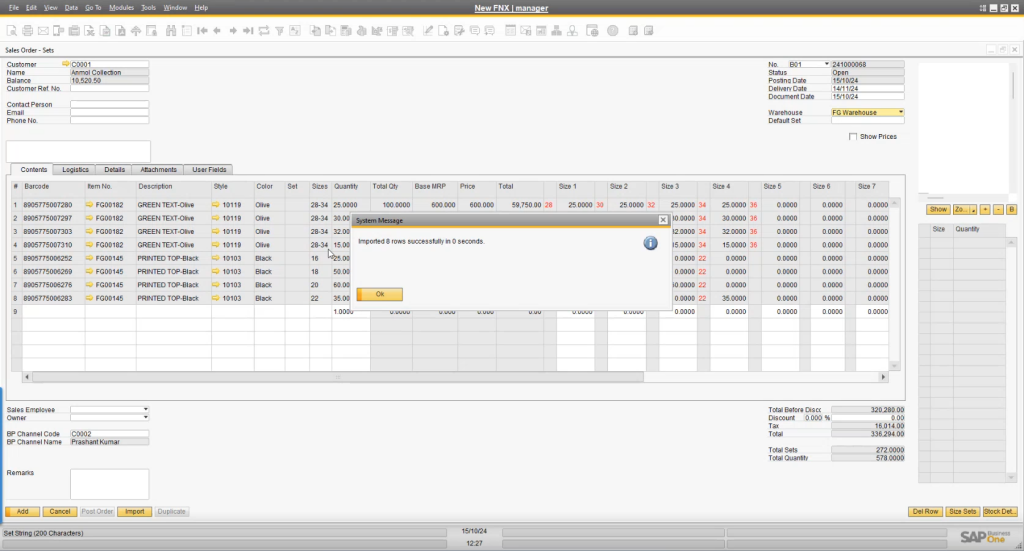
Once done, FashionNX will import the details in that Excel file, and the Sales Order – Sets window will get updated with all the details, followed by a system message that will pop up displaying the successful import message
Sales Order – Import
The Sales Order – Import feature in FashionNX simplifies the process of uploading bulk orders into the system.
To access this functionality, users navigate to Modules > Operations > Sales > Sales Order – Import which opens the Import Orders window. This window contains essential fields such as File Name, Template, Target Object, Records, From Line No., and Up To Line No.
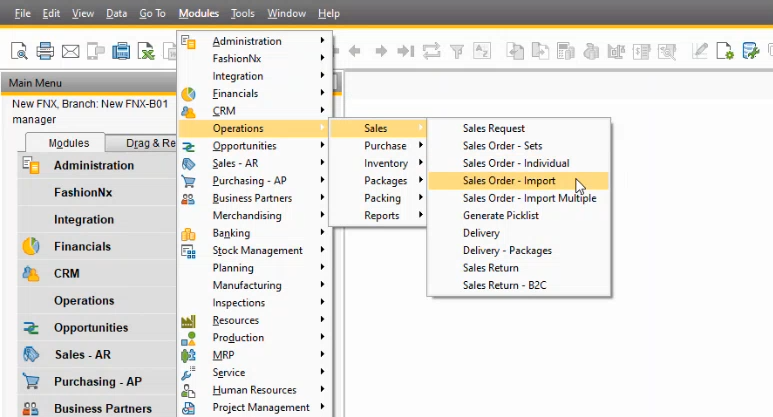
First, the user has to set the Template field to Import Sales Order. This automatically sets the Target Object field, in this case 17
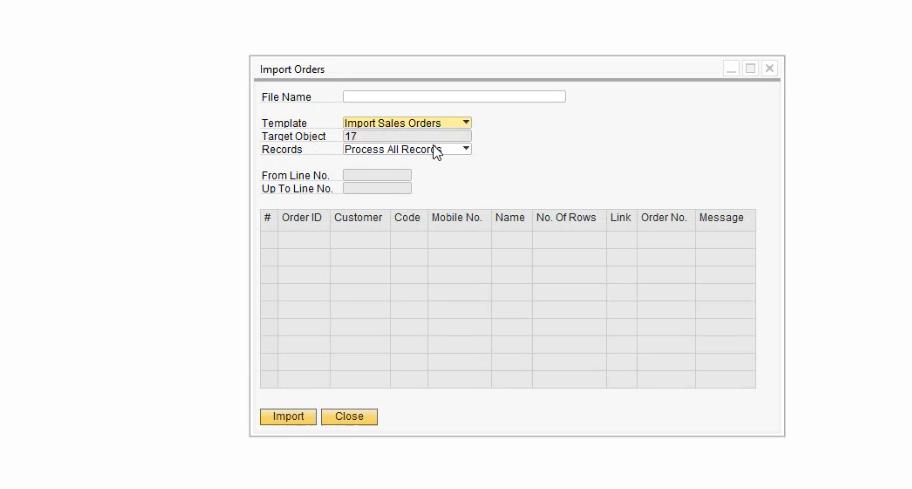
Next, users select the relevant file by clicking on the File Name field, which opens the Windows File Explorer. After locating and selecting the desired Excel file
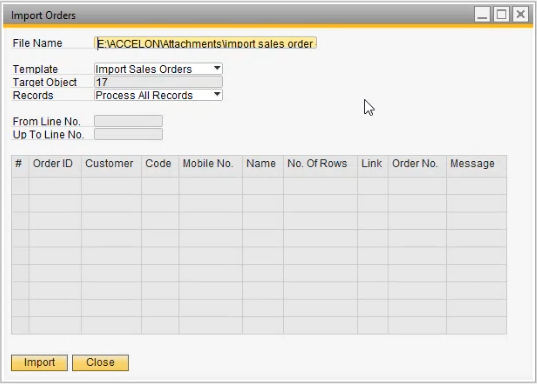
Clicking the Import button initiates the upload process
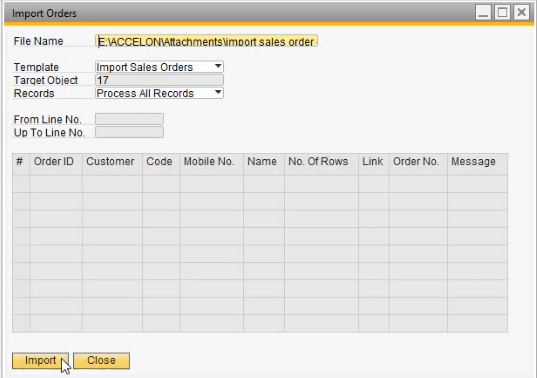
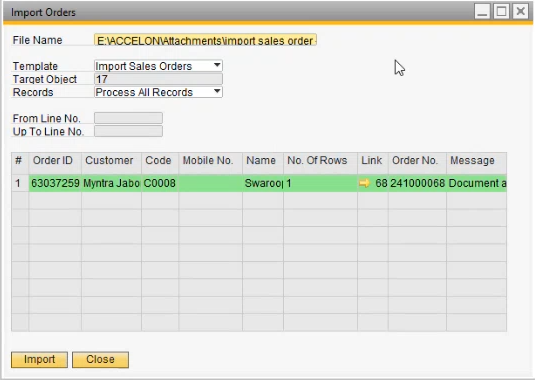
Once the file is successfully imported, the rows and columns in the Import Orders window are updated with the uploaded details
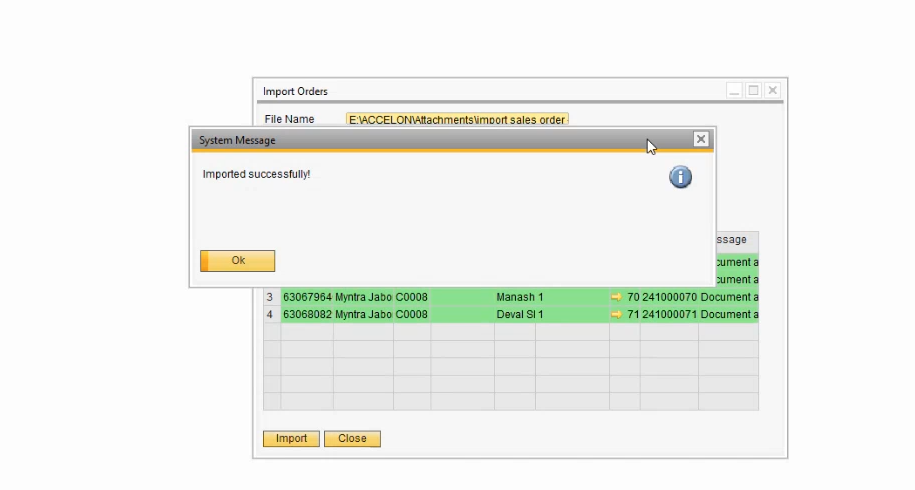
A confirmation system message then appears, notifying the successful import will appear as seen in the screenshot
To see the sales order, users must click on columns in the Link row in the table, in this case, the first one – 68
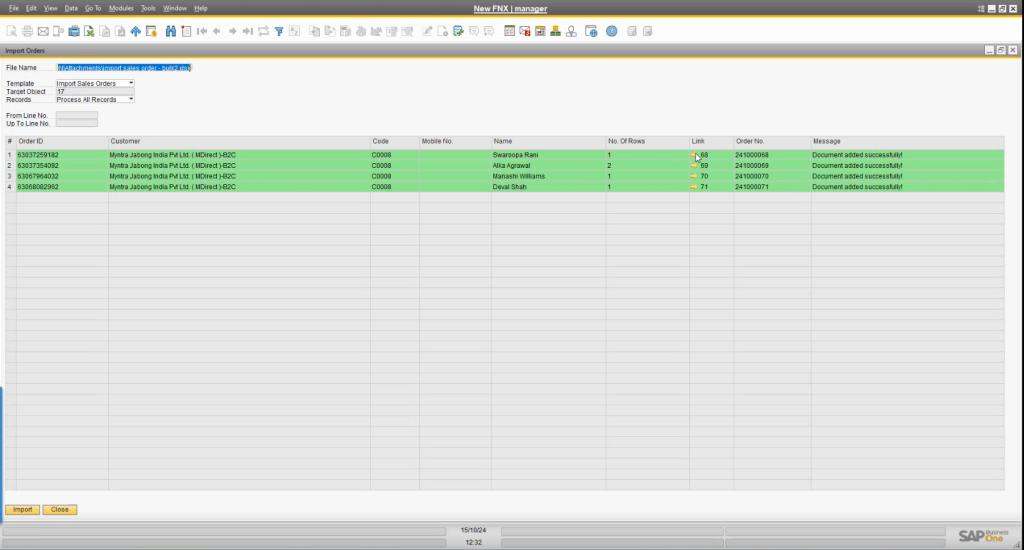
Doing so opens the detailed Sales Order document window for further actions or verification. This functionality ensures a seamless and efficient way to manage large-scale sales data.
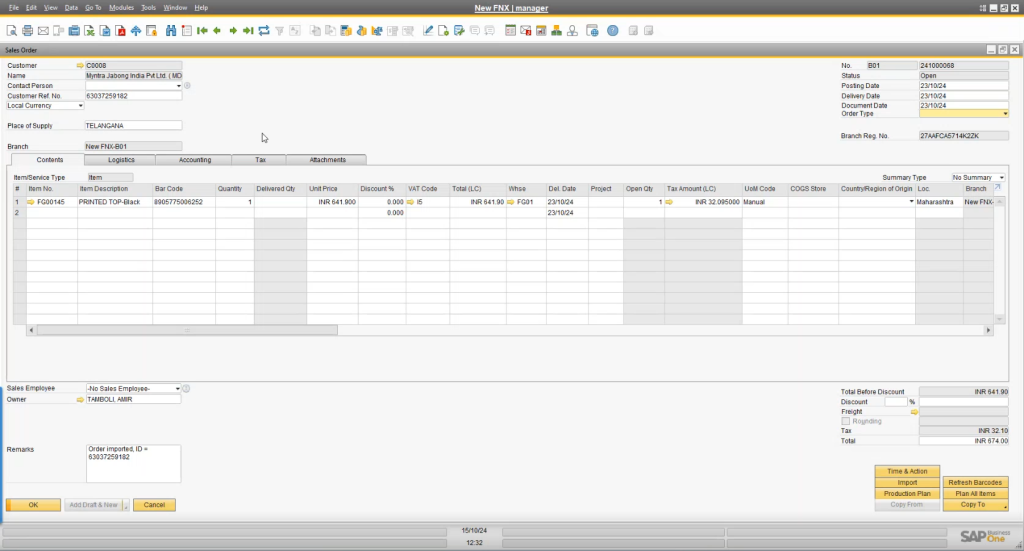
Sales Order – Individual
To access the Sales Order – Individual feature in FashionNX, users navigate to Modules > Operations > Sales > Sales Order – Individual
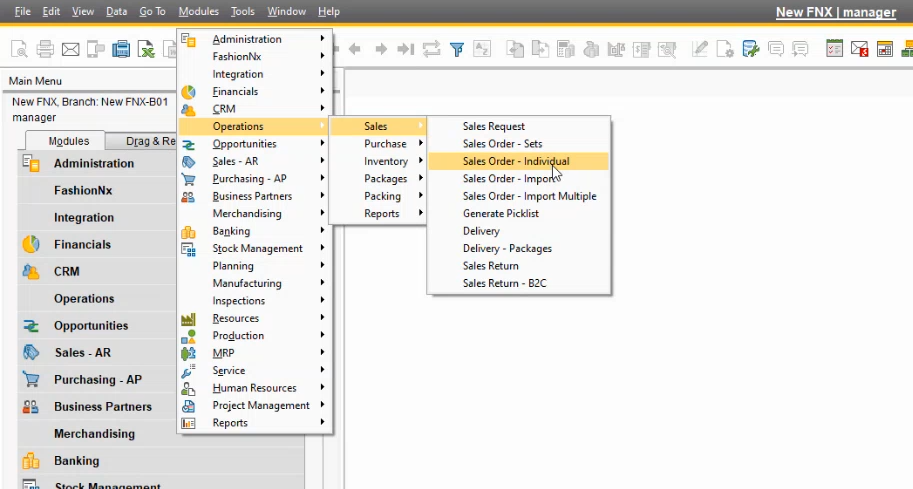
This opens the Sales Order – Individual window, which provides a streamlined interface for managing single sales orders
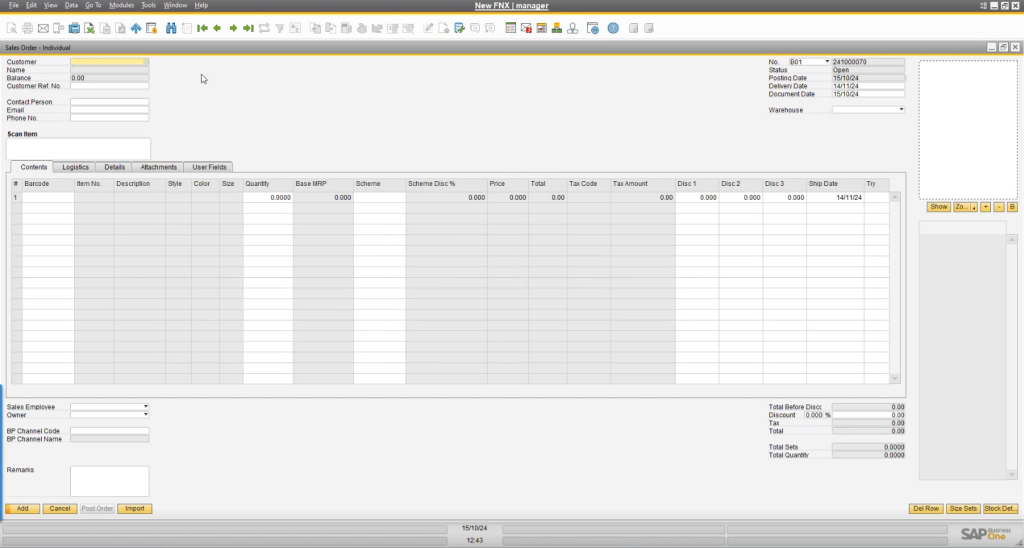
On the top left, users can input details such as Customer, Name, Balance, Customer Ref. No., Contact Person, Email, and Phone No. On the top right, fields for No., Status, Posting Date, Delivery Date, Document Date, and Warehouse are available for comprehensive order management.
The process of generating a sales order here mirrors the steps in Sales Order – Sets, offering flexibility through multiple input methods. Users can manually Select, Scan Barcodes for quick addition, or Import Details using pre-prepared Excel files. This versatile approach ensures that businesses can efficiently create and manage individual sales orders, catering to diverse operational requirements.
Delivery
Managing deliveries in FashionNX is a streamlined process designed to ensure accuracy and efficiency. To access Delivery users must click on Modules>Operations>Sales>Delivery
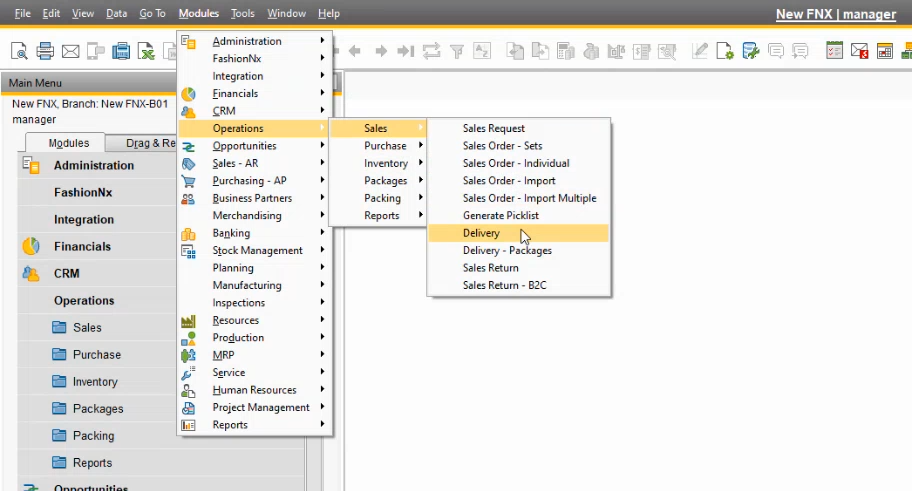
This will open the Delivery window
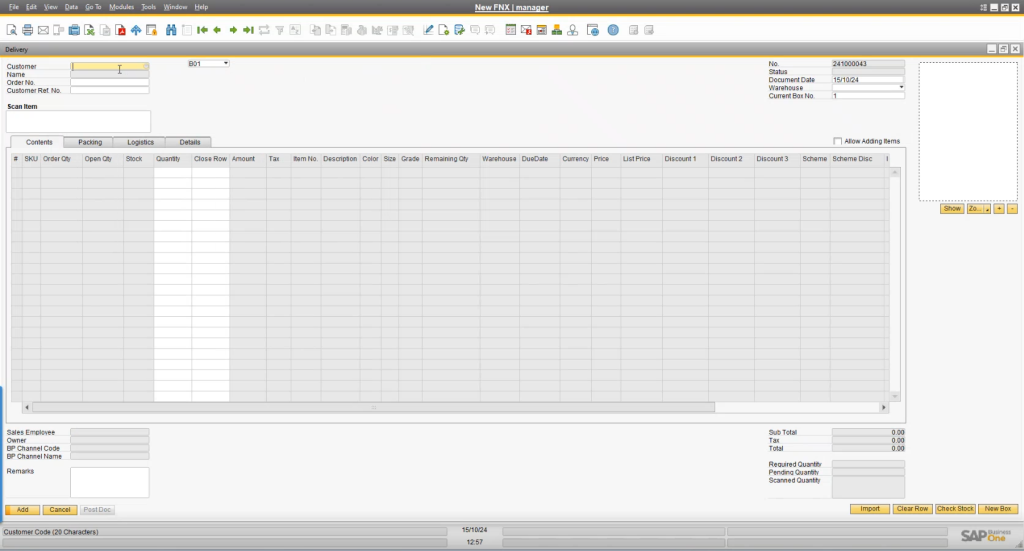
Once opened, the window displays key fields on the top left, such as Customer, Name, Order No., and Customer Ref. No., and on the top right, fields like No., Status, Document Date, Warehouse, and Current Box No. The interface also includes a Scan Items field and an Allow Adding Items checkbox, facilitating dynamic adjustments during delivery preparation. Tabs for Contents, Packing, Logistics, and Details can be found below and provide comprehensive delivery information and control.
To initiate a delivery, users must first select a customer in the Customer field, in this case – C0001
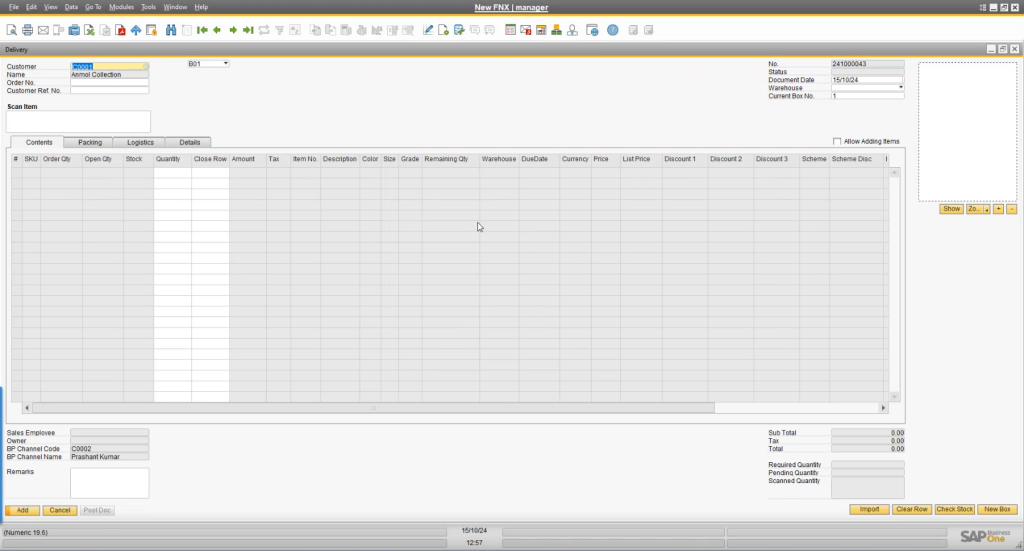
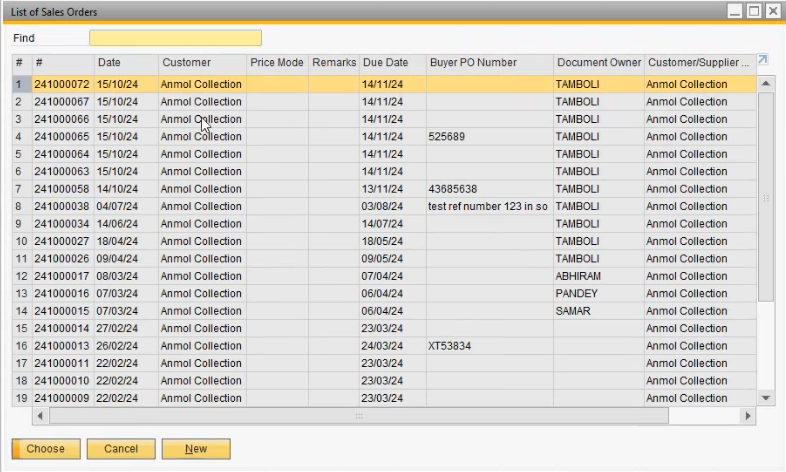
This is followed by selecting the order number in the Order No. tab by clicking on it which will open the List of Sales Orders window to select an order from
The relevant details populate automatically, ensuring consistency with the sales order
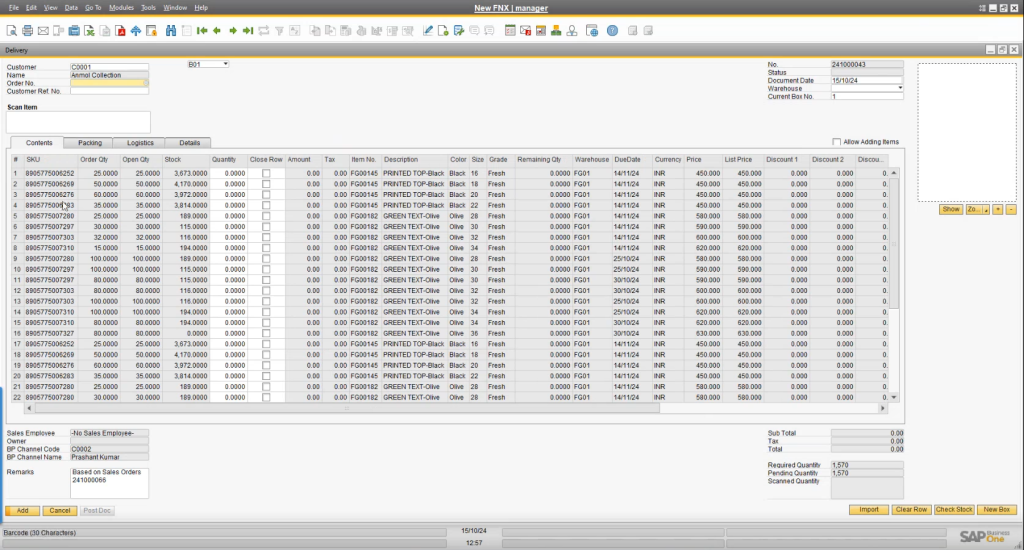
Users can then specify the warehouse in the Warehouse field for order fulfillment, which must align with the warehouse listed in the sales order
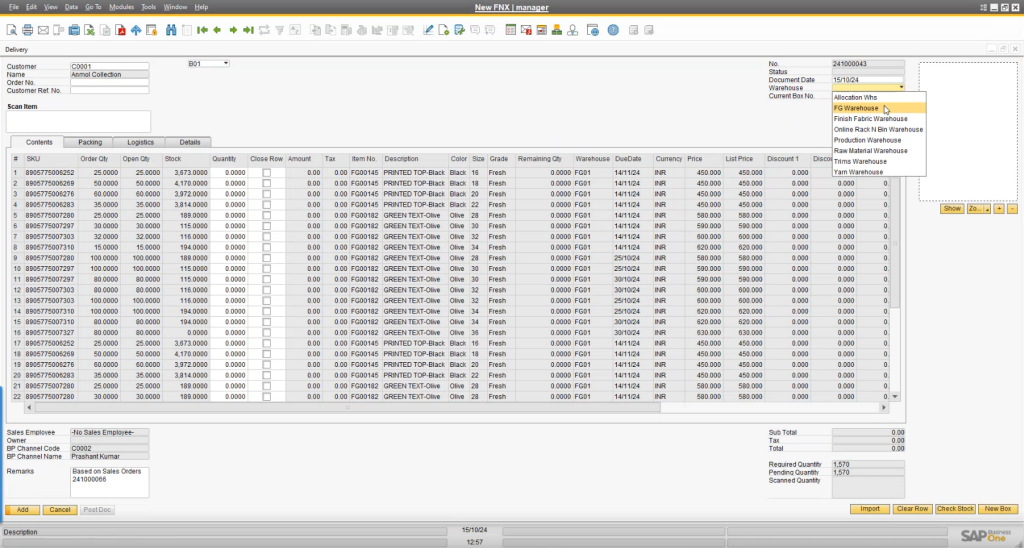
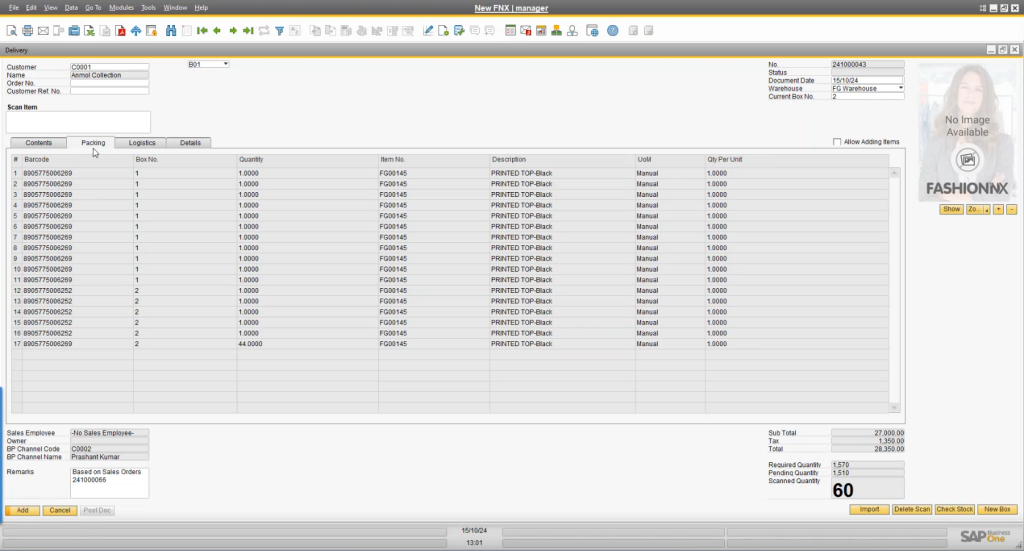
A standout feature of the Delivery module is the Current Box No., which allows precise tracking and packaging. As the users are scanning the sales order, users will get the exact box number(s) in which the scanned items will be packed in the Packaging tab under Box No. row. Similarly, if users need to package certain products in a different box, then they can update the Current Box No. field and start scanning the items.
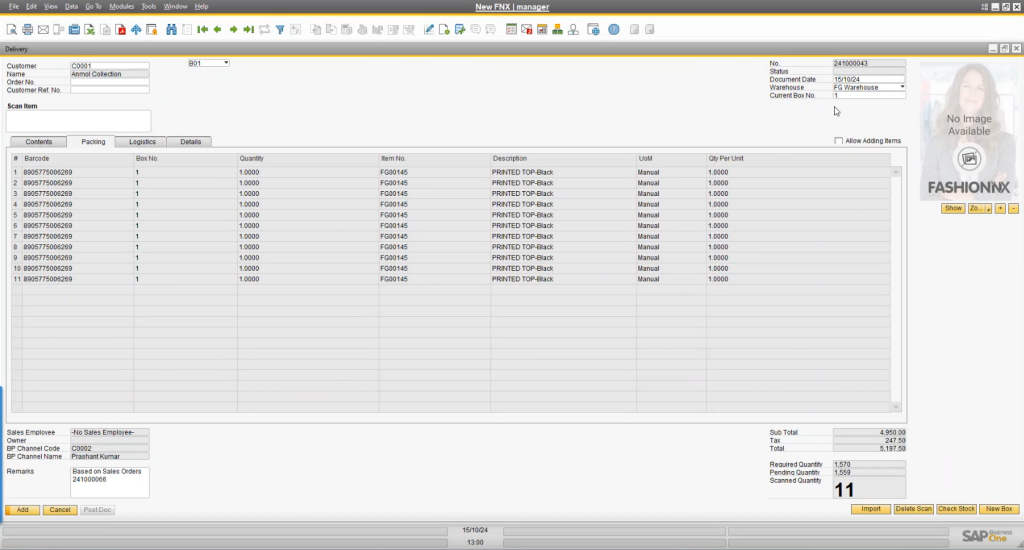
Once done, users will be able to see the packing list with its exact details in the Packaging tab
After verifying and cross-checking all the details, users can proceed by clicking the Add button, which triggers a system prompt asking, “Post delivery now?”
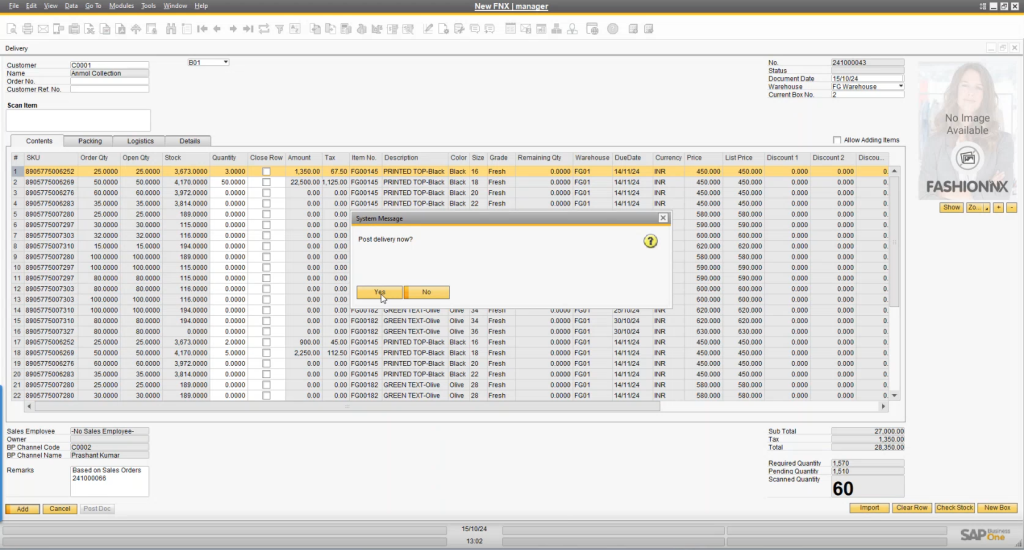
Upon confirming by selecting Yes, the Delivery document is posted
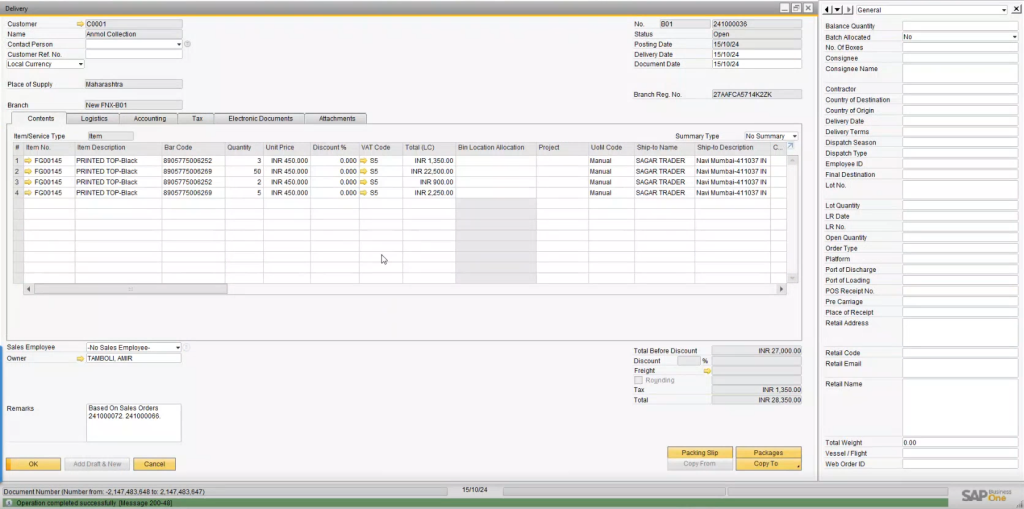
This document contains all the essential details about the order delivery for easy reference. Additionally, users can explore the Relationship Map to understand the connection between the delivery document and associated sales orders. By right-clicking anywhere on the delivery document and selecting Relationship Map
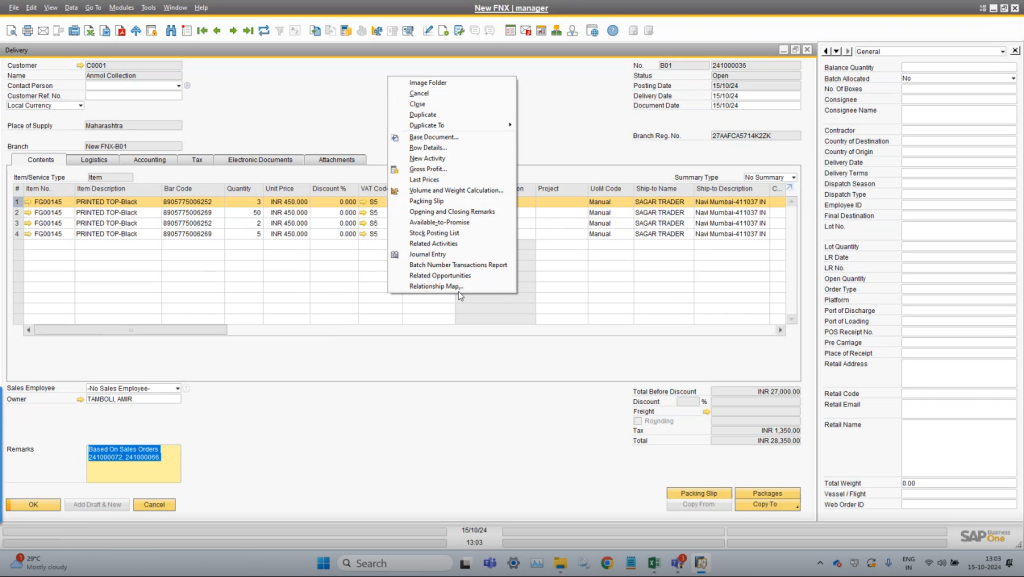
the system opens a detailed view showing the linked Sales Orders
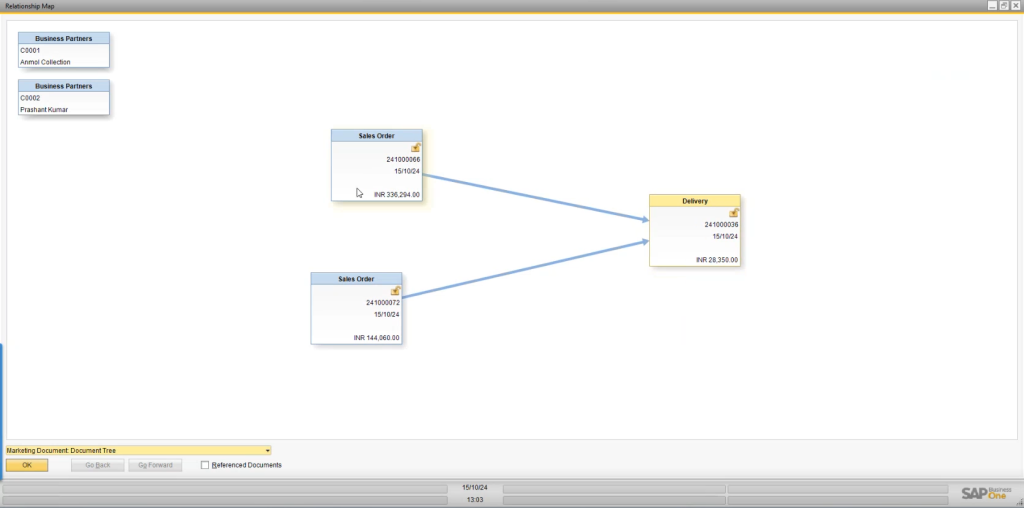
As seen in the screenshot, two sales orders are linked to the particular delivery.
For enhanced packaging details, users can access Packing Slips directly within the Delivery window by clicking the Packing Slip button in the bottom right corner
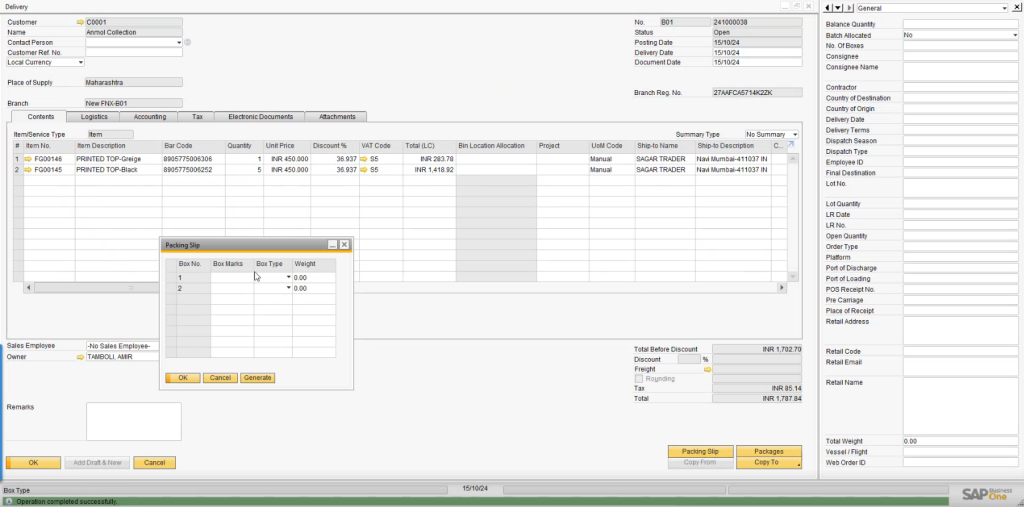
The Packing Slip window displays critical details such as Box No., Box Marks, Box Type, and Box Weight
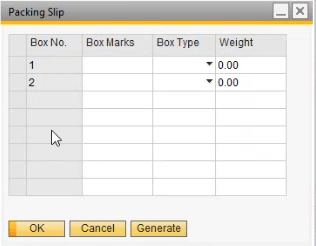
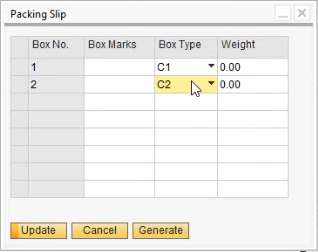
Users can customize box markings in the Box Marks section and select predefined box types in the Box Type section ensuring clarity and precision in order fulfillment
Conclusion
In the fast-paced world of fashion, where precision and agility are key, FashionNX emerges as a game-changing solution for managing sales and deliveries. This blog has detailed the extensive capabilities of FashionNX’s Sales and Delivery modules, illustrating how businesses can simplify and streamline operations.
From efficiently creating sales orders, whether in bulk or individually, to managing deliveries with features like barcode scanning, relationship mapping, and customizable packing slips, FashionNX empowers users to handle every step of the sales order and delivery process with accuracy and ease.


